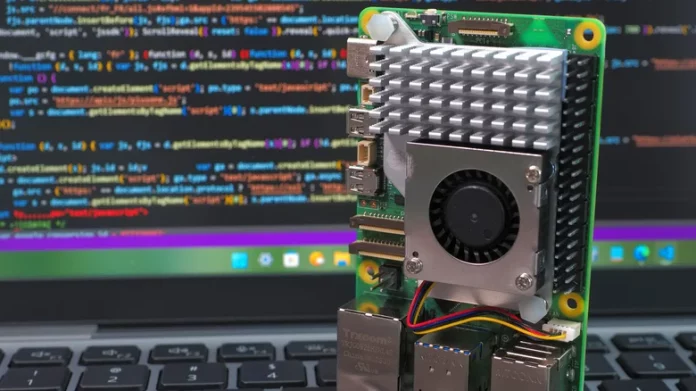
When it comes to DIY tech, the Raspberry Pi is one of the most iconic and versatile devices available. Having been around for over a decade, its vibrant community is what truly makes the Pi fascinating. At its core, the Raspberry Pi is a compact, low-power computer designed to inspire creativity and innovation. Its broad compatibility with versatile accessories, together with its open design and general-purpose input/output (GPIO) pins, turns this little device into a blank canvas for endless experimentation.
Whether you’re looking to enhance your smart home or dive into robotics, the possibilities with Raspberry Pi are vast. However, this same flexibility can be overwhelming, especially for beginners navigating the wide variety of accessories, software options, and project ideas found online.
To help you get started, we’ve curated beginner-friendly Raspberry Pi projects that are simple to set up, rewarding to build, and highly practical. Each project provides a unique learning experience, ranging from networking and coding basics to hands-on electronics.
Network-wide ad blocker
Google’s crackdown on ad blockers has made many conventional solutions less effective, resulting in slower browsing clogged with ads. With a Raspberry Pi, you can create a network-wide ad blocker that filters ads on every device connected to your Wi-Fi. This setup uses Pi-hole, a lightweight program that checks DNS requests against known ad and tracker domains, blocking any matches. You’ll need a Raspberry Pi (even an older Pi 3 works), a microSD card, Raspberry Pi OS, and the Pi-hole software. Installing Pi-hole and configuring your DNS is straightforward, with detailed guides available. After setup, you’ll enjoy a cleaner browsing experience across all your devices, and Pi-hole’s web dashboard will show blocked requests and their source devices.
Time-lapse camera
Time-lapse photography captures gradual changes over extended periods and compresses them into compelling videos—perfect for weather shifts, plant growth, or long DIY projects. Instead of dedicating your phone or expensive camera for days or weeks, a Raspberry Pi makes an ideal, low-maintenance time-lapse camera. For this project, you need a Raspberry Pi, a camera module (the official Raspberry Pi High Quality Camera is recommended), and a microSD card with Raspberry Pi OS. Depending on storage needs, external USB drives or SSDs might be required. While it involves running some terminal commands, comprehensive online tutorials make the process manageable.
Wake-up light
Traditional alarms can be jarring because the sudden noise startles you awake. A wake-up light provides a gentler alternative by simulating sunrise with gradually increasing brightness before your set alarm time. This project needs an RGB LED strip, a suitable power supply, a Raspberry Pi, and basic Python scripting. More advanced builds can include housings, touch sensors, and control buttons. The light’s color temperature, brightness, and timing can be customized to mimic natural sunrise, and some creators even integrate sound triggers or smart home automation for synchronized wake-up experiences.
Local AI assistant
Cloud-based AI assistants like ChatGPT send your data to remote servers for processing, which may raise privacy concerns. A local AI assistant on a Raspberry Pi offers a private, offline alternative using open-source models. YouTuber Jdaie Lin’s project includes a display, battery, voice recognition, and an open-source chatbot called Whisplay. Another simpler option relying on cloud processing only requires a Raspberry Pi Zero, a Whisplay Hat display, and a battery. Although more complex than simpler projects, detailed guides help you get started over a weekend, offering valuable hands-on experience with speech recognition, AI models, and hardware integration.
Retro gaming console
While retro handheld consoles are popular, building your own retro gaming console with a Raspberry Pi offers a deeply satisfying DIY experience. The RetroPie software bundle consolidates popular emulators for systems like NES, SNES, Sega Genesis, PlayStation, and Dreamcast into an easy-to-use package with a sleek interface. Just flash the RetroPie image to an SD card, connect your Raspberry Pi to a display via HDMI, and follow the setup instructions. Most emulators come pre-installed, allowing quick access to legally owned games. A large community supports RetroPie, offering tweaks, mods, and troubleshooting. The Raspberry Pi 5 can run home consoles up to the Dreamcast generation smoothly.
DIY network-attached storage
Setting up network-attached storage (NAS) is a classic project for tech enthusiasts. A NAS acts as a private, local alternative to cloud storage services. Using a Raspberry Pi combined with OpenMediaVault software, you can create a compact, low-power home server for storing and sharing files. OpenMediaVault’s guides lead you through flashing the software, configuring drives, setting user permissions, and enabling remote access. External drives connect via USB hubs, though a dedicated storage kit is a useful investment. This NAS can extend into a mini server for backups, media streaming, and more.
Personal cloud storage server
Public cloud services like Google Drive or Dropbox trade convenience for control over your data. With an open-source cloud platform like Nextcloud, you can convert your Raspberry Pi into a private cloud server. The required hardware includes a Raspberry Pi, microSD card, and an external USB hard drive. By installing the pre-configured NextCloudPi OS, you gain a secure, personal cloud storage solution with file syncing and remote accessibility. This alternative eliminates subscriptions, safeguards your privacy, and puts file control firmly in your hands.
Smart home hub
Smart home gadgets offer great convenience but often rely on cloud services that can compromise privacy. With the Home Assistant software paired with a Raspberry Pi, you can build a smart home hub focused on local control and privacy. Home Assistant recommends using a Raspberry Pi 4 or 5 with at least 2GB RAM along with a microSD card and Ethernet cable for setup. Flash the Home Assistant OS, connect the Pi to your network, and follow the onboarding guide to automatically detect and configure many smart devices. From there, you can create custom automations such as turning off lights on a schedule or starting your coffee maker when your alarm goes off. This system runs entirely on your local network, enhancing speed and security.


