Is your computer running slower than usual? It might be time for a quick tune-up. While there are many ways to speed up Windows—like checking for memory leaks, uninstalling unused programs, or scanning for viruses—one of the simplest maintenance steps is to optimize your storage drive through defragmentation or trimming.
The good news: Windows handles much of this automatically. Still, if your PC feels sluggish or you want to make sure your drives are being properly maintained, here’s how to manually optimize them.
Why Drives Need Defrag or Trim
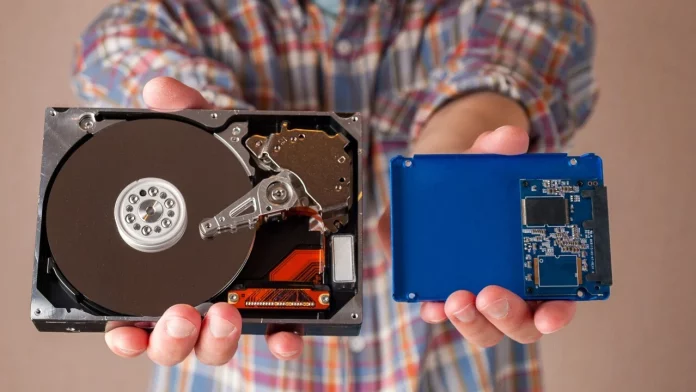
Traditional hard disk drives (HDDs) use spinning magnetic platters to store data in small fragments across the surface. Over time, as files are created, deleted, and moved, parts of the same file can become scattered in different locations on the disk—a process called fragmentation. When that happens, your computer’s read/write heads must jump around to gather each fragment, slowing down performance.
Defragmentation reorganizes this data so that files are stored in contiguous blocks. This minimizes disk head movement, allowing your HDD to read and write data more efficiently.
On the other hand, solid-state drives (SSDs) work differently. SSDs store data in flash memory chips, so they don’t rely on moving parts. As a result, fragmentation doesn’t affect them the same way. Instead, SSDs need a maintenance process called Trim.
When you delete files on an SSD, the data remains in storage but is marked as invalid. The Trim function tells the drive which blocks of data are no longer in use, allowing the SSD to erase them in advance. This keeps write operations fast and prevents long-term slowdowns.
How Windows Handles Drive Optimization
Both Windows 10 and Windows 11 automatically perform drive optimization in the background. The system detects whether a drive is mechanical or solid-state and chooses the correct method—defragmentation for HDDs and trimming for SSDs.
Still, it’s a good idea to check occasionally to ensure the process is running as expected.
How to Manually Optimize Your Drive
- Open the Optimize Drives Tool
- Click the Start button and type “defrag” in the Windows search bar.
- Select Defragment and Optimize Drives from the results.
- View Drive Status
- The Optimize Drives window lists all available drives along with their current status and the date they were
last optimized. - For HDDs, look for a fragmentation percentage—0% means everything is in good shape.
- For SSDs, you’ll see an “OK” status and the last time the Trim command was executed.
- Run Optimization Manually
- Select a drive and click Optimize to defragment or trim it immediately.
- Adjust the Optimization Schedule
- Under “Scheduled optimization,” click Change settings to modify frequency.
- You can choose Daily, Weekly (the default), or Monthly optimization.
- Ensure the “Run on a schedule” box is checked so Windows continues maintaining your drives automatically.
Keeping Your PC in Peak Condition
For most users, Windows’ built-in optimization is enough to keep drives healthy and performance steady. However, running manual checks from time to time ensures your HDDs remain defragmented and your SSDs stay trimmed—helping your computer run faster and more efficiently for years to come.


